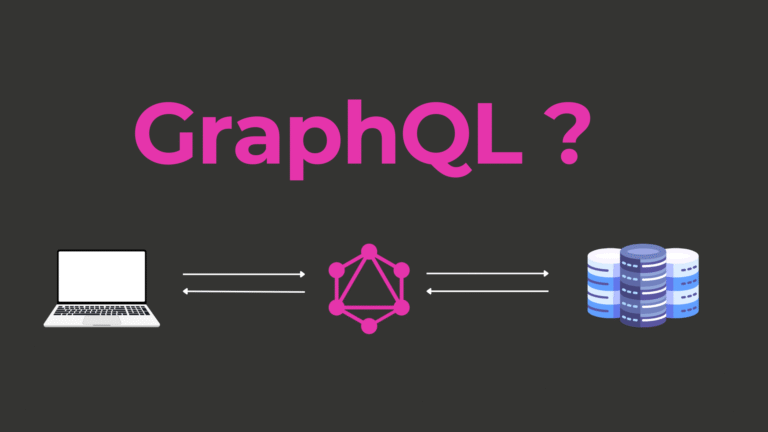
GraphQL offers a modern, flexible way to build APIs, and if you’re a JavaScript developer, the best place to start is with Node.js and Apollo Server. In this first tutorial of our GraphQL series, you’ll learn how to build a working GraphQL API from scratch and understand the key building blocks that make it work: Schema, Query, and Resolver.
This post is tailored for beginners who are comfortable with JavaScript and Node.js but new to GraphQL.
🎯 What You’ll Learn
How to install and configure Apollo Server with Node.js
What a GraphQL Schema is and how to define one
How Queries and Resolvers Work Together
How to test your API using Apollo Sandbox or GraphQL Playground
🛠 Prerequisites
Make sure you have:
Node.js installed (v14+)
Basic knowledge of JavaScript
A code editor like VS Code
npm or yarn package manager
Let’s get started!
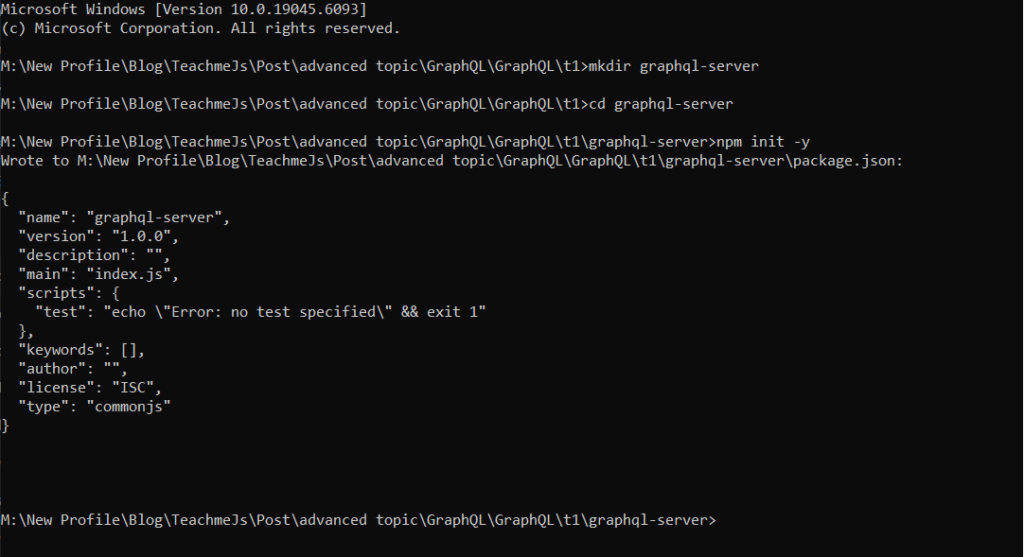
📁 Step 1: Create Your Project Folder
First, set up a new Node.js project.
1. mkdir graphql-server
2. cd graphql-server
3. npm init -y
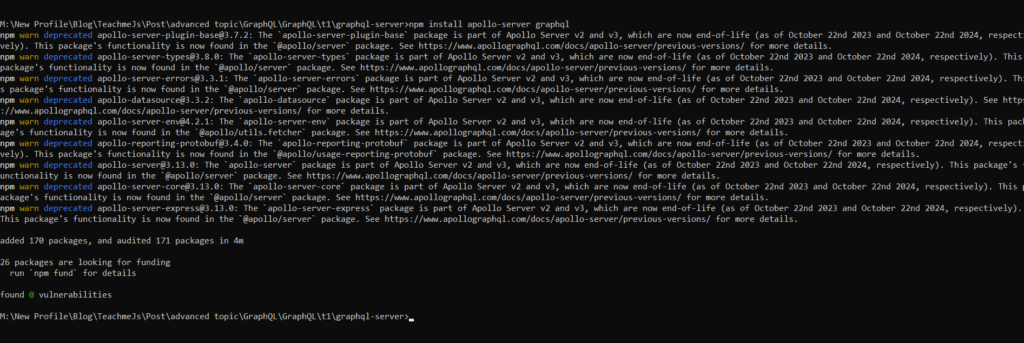
Install the required dependencies:
4. npm install apollo-server graphql
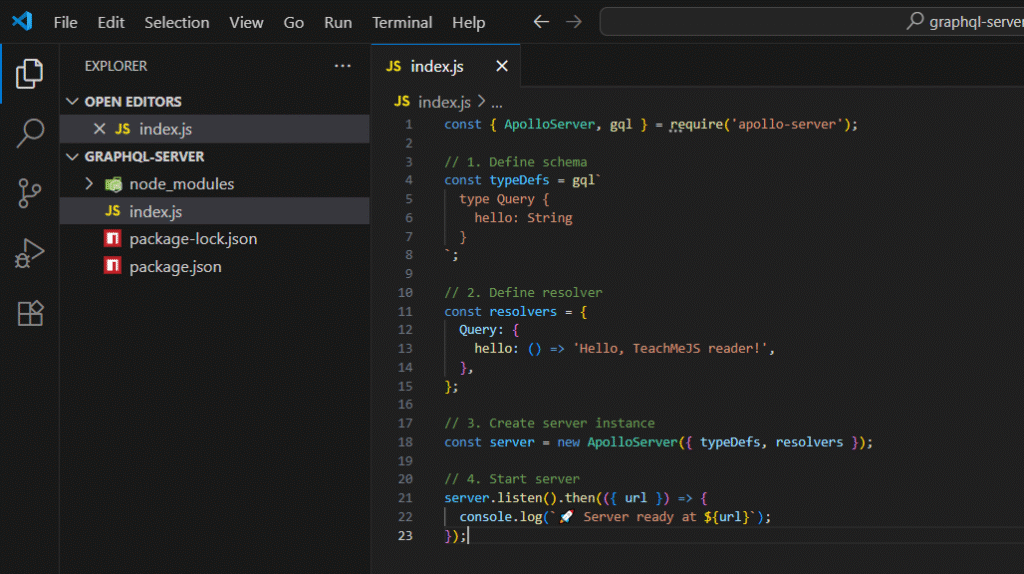
📄 Step 2: Create the GraphQL Server
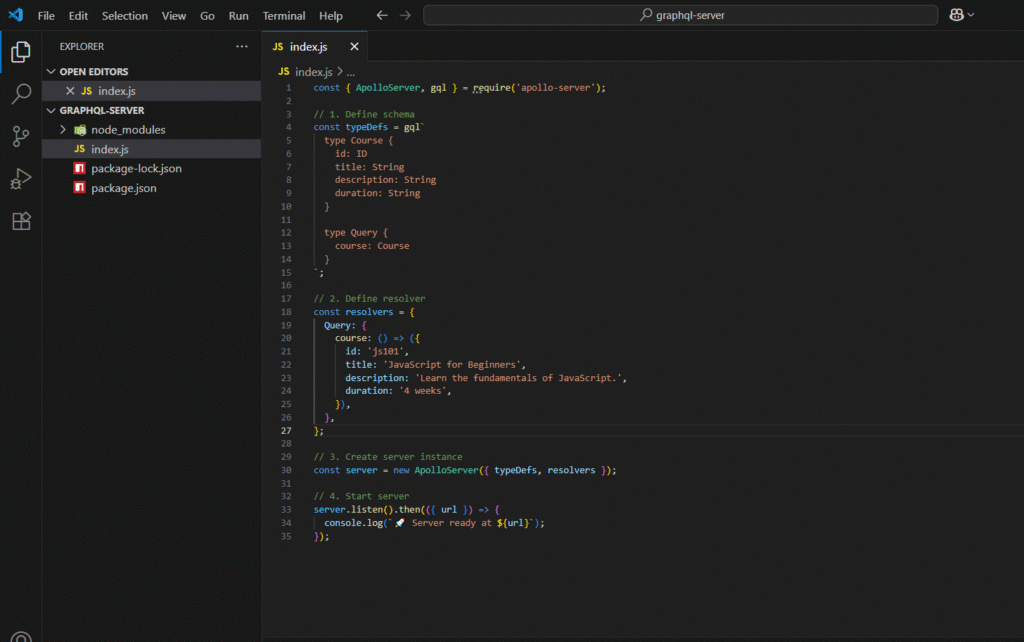
Create a file named index.js:
Open it and start writing your first GraphQL server.
📌 Basic Apollo Server Setup
Now run the server:
node index.js
You should see:
🚀 Server ready at http://localhost:4000/
Open that URL in your browser Apollo Server comes with a built-in IDE called Apollo Sandbox, where you can test your queries.
🧠 Understanding the Core Concepts
Let’s break down what you just built.
📌 1. GraphQL Schema
The schema defines what types of data clients can query. In GraphQL, everything starts with a type. Your schema must define at least one Query type.
type Query {
hello: String
}
This tells GraphQL that the client can make a query called hello, which will return a String.
This maps directly to your hello field in the schema. When someone queries hello, this function runs and returns the value.
🔁 Expanding the Schema — Let’s Add More Data
Let’s make this more useful by defining a custom Course type and querying it.
🧩 Update the Schema
const typeDefs = gql`
  type Course {
            id: ID
            title: String
            description: String
            duration: String
   }
type Query { course: Course } `;
🧮 Update the Resolver
const resolvers = {
      Query: {
        course: () => ({
           id: 'js101',
           title: 'JavaScript for Beginners',
           description: 'Learn the fundamentals of JavaScript.',
           duration: '4 weeks',
       }),
    },
};
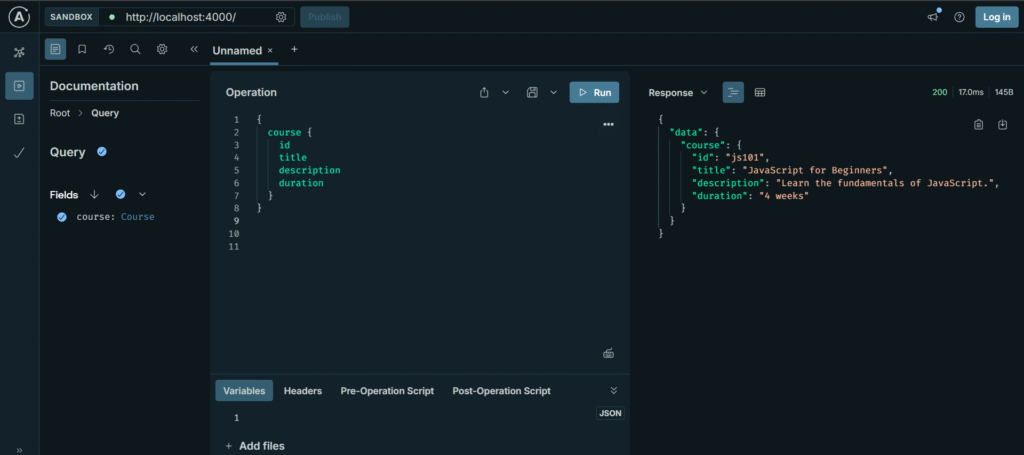
Restart your server and run this query:
{
course {
   id
   title
   description
   duration
  }
}
✅ Output:
Congratulations! 🎉 You’ve now created a GraphQL API with a custom type and real data structure.
📌 Common Terms Recap
Term
Meaning
Schema
Describes the structure of your API, including types and fields
Query
Client request to read data
Resolver
Function that returns the data for a specific field in the schema
🧪 Testing Tools
You can test your GraphQL queries using:
Apollo Sandbox (auto-opens with Apollo Server)
GraphQL Playground (optional; install separately)
Postman (supports GraphQL)
Insomnia (REST & GraphQL client)
✅ Summary
In this post, you learned:
How to set up Apollo Server in a Node.js project
How to define your first GraphQL schema and query
How resolvers work to return data
How to test your API using the Apollo interface
This is the foundation you’ll build on. In the next part, we’ll explore how to define complex schemas with multiple types and relationships — bringing us closer to building real-world apps.