GraphQL Schema Deep Dive — Types, Queries, Mutations, and Scalars

Welcome to Part 2 of our GraphQL tutorial series on TeachMeJS. In Part 1, we set up a simple GraphQL server using Node.js and Apollo Server. If you haven’t followed that post yet, go check it out first here.

In this post, we’ll dive deep into the GraphQL schema — the heart of every GraphQL API. You’ll learn how to define:

  • Object types (with the type keyword)

  • Query and Mutation types

  • The difference between Scalars and Custom Types

And best of all, we’ll walk through the whole process using Visual Studio Code (VS Code) — so you know exactly where to write your code and how to run it.


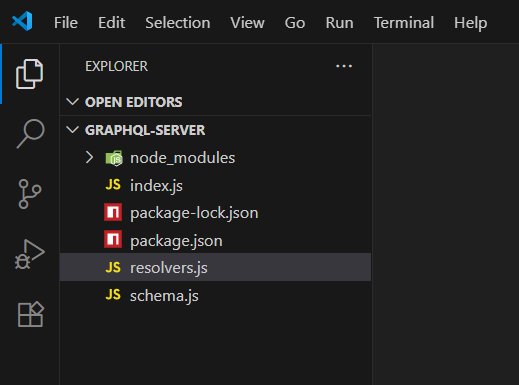
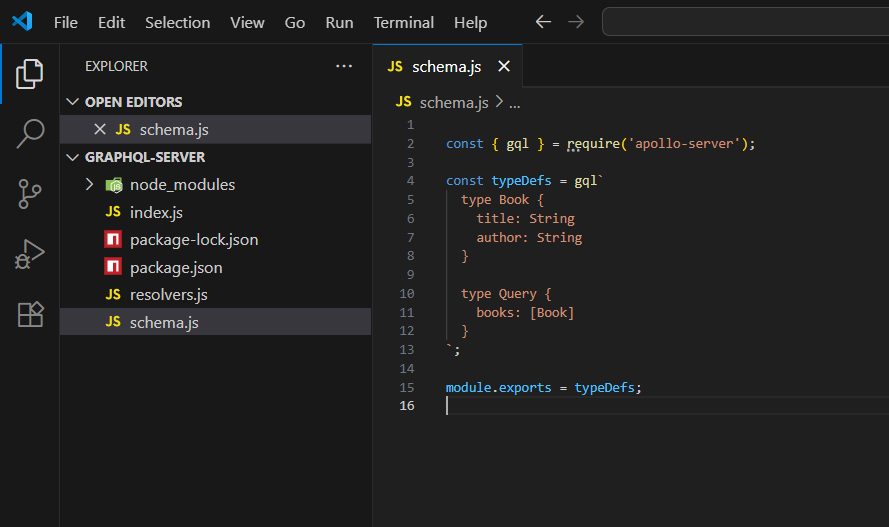
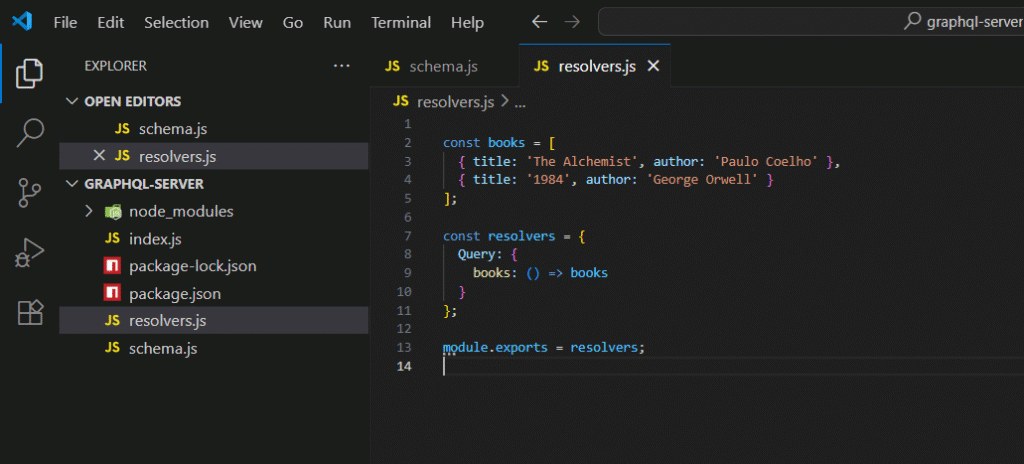
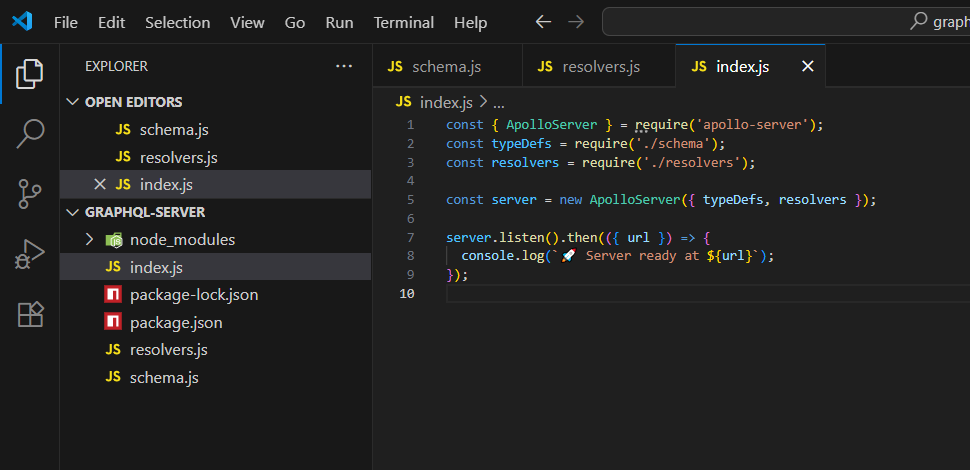
📁 Project Folder Structure in VS Code

Before we dive into the code, here’s how your folder structure should look in VS Code:

Here,

/graphql-server

├── index.js ← Main server entry point
├── schema.js ← where you define GraphQL types and schema
├── resolvers.js ← where your query/mutation logic goes
├── package.json


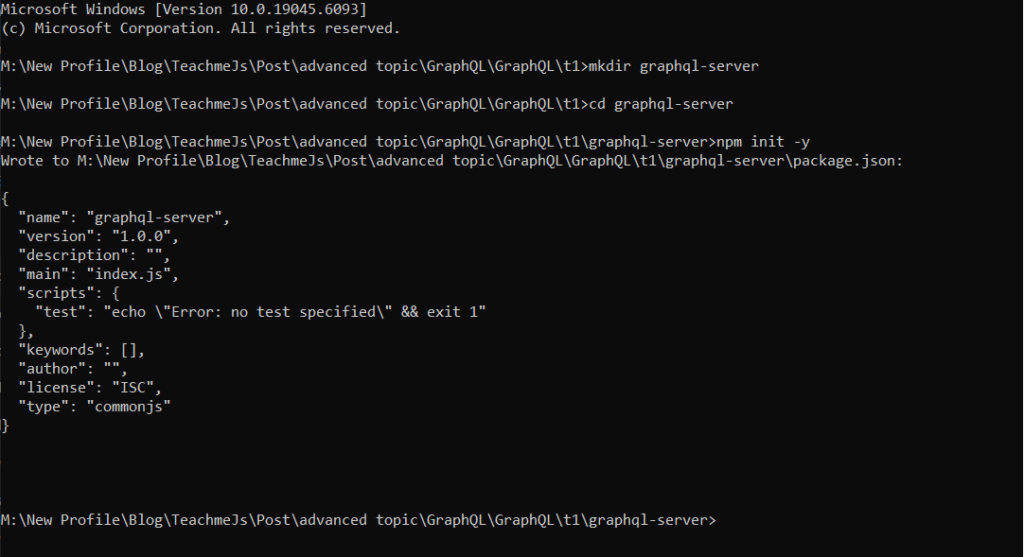
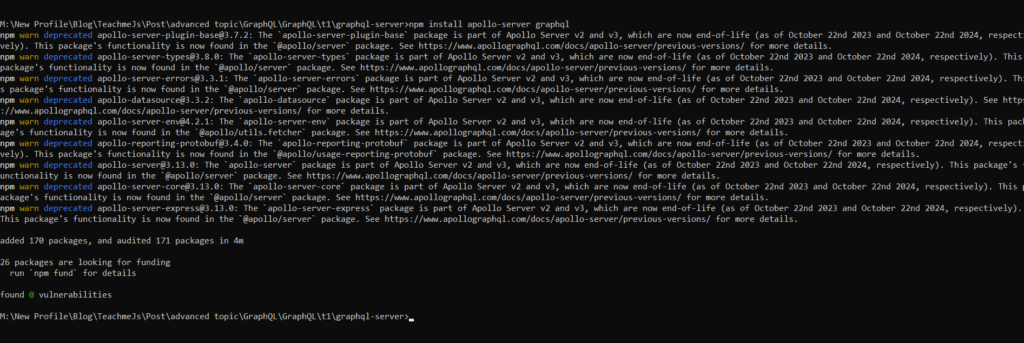
Step 1: Setup (If Not Done Yet)

⛳ If you’ve already completed Part 1, skip this section.

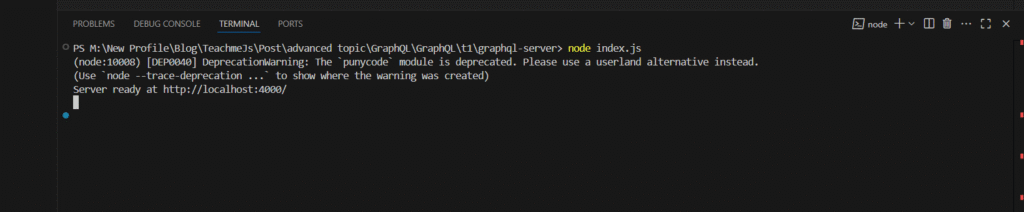
Open VS Code and run the following in the terminal:

1. mkdir graphql-server
2. cd graphql-server
3. npm init -y
4. npm install apollo-server graphql
5. code .

Step 2: Defining Your GraphQL Schema

Create a new file called schema.js in the root of your project.

// schema.js
const { gql } = require(‘apollo-server’);

const typeDefs = gql`
    type Book {
        title: String
        author: String
  }

    type Query {
       books: [Book]
  }
`;

module.exports = typeDefs;

🔍 What’s happening here?
  • type Book: Defines a custom object type with title and author fields, both of type String.

  • type Query: The entry point to read data. We’re saying we can query a list of books ([Book] means an array of Book objects).

Step 3: Add Some Resolvers

Create a file called resolvers.js:

const books = [
{ title: 'The Alchemist', author: 'Paulo Coelho' },
{ title: '1984', author: 'George Orwell' }
];

const resolvers = {
    Query: {
          books: () => books
   }
};

module.exports = resolvers;

This provides the actual data that will be returned when the books query is called.


Step 4: Start the Server

In index.js, wire everything together:

const { ApolloServer } = require('apollo-server');
const typeDefs = require('./schema');
const resolvers = require('./resolvers');

const server = new ApolloServer({ typeDefs, resolvers   });

server.listen().then(({ url }) => {
    console.log(`Server ready at ${url}`);
});

▶️ Run the server

Open a terminal in VS Code and run:

node index.js

You’ll see:

Visit that URL in your browser. You’ll see the Apollo Sandbox Explorer.


Step 5: Writing and Running a Query

In Apollo Sandbox, try this query:

query {
  books {
          title
          author
   }
}

You should see:

Scalar Types vs. Custom Types

What Are Scalar Types?

Scalars represent primitive values.

GraphQL has 5 built-in scalars:

  • String – Textual data

  • Int – Integer values

  • Float – Decimal numbers

  • Boolean – true/false

  • ID – Unique identifier (usually used with database records)

What Are Custom Types?

Any type you define using type keyword is a custom object type, such as Book, User, Course, etc.

type User {
   id: ID!
   name: String
   age: Int
}

This gives you the power to describe your data exactly how you want it.


Understanding Query, Mutation, and Schema Roles

ComponentRole
typeDefs (in schema.js)Defines the structure of your API (types, queries, mutations)
resolvers (in resolvers.js)Implements the logic for each field
ApolloServerBinds everything together and starts the server

What’s Next?

Now that we’ve defined basic GraphQL schemas and served our first query, in the next part we’ll learn how to:

  • Add mutations to change data

  • Handle input types

  • Validate inputs

  • Add error handling

Stay tuned for Part 3: Creating Mutations in GraphQL


Menaka Jayasundara
Menaka Jayasundara
Articles: 46

Leave a Reply

Your email address will not be published. Required fields are marked *