Creating Your First React App: A Step-by-Step Guide

React.js is one of the most popular JavaScript libraries for building modern web applications. Developed by Facebook, it allows developers to create interactive and dynamic UIs efficiently. In this tutorial, we will walk through the process of setting up your first React application, from installation to running your first React app.
By the end of this guide, you will understand:
- How to install React using Create React App (CRA)
- The folder structure of a React project
- The purpose of index.js and App.js
How to start and run a React application
1. Installing React Using Create React App (CRA)
What is Create React App (CRA)?
Create React App (CRA) is the easiest way to set up a new React project. It provides a boilerplate with essential dependencies, a local development server, and an optimized build setup.
Prerequisites
Before installing React, ensure you have the following installed:
- Node.js (version 14 or later)
- npm (Node Package Manager) -comes with Node.js
You can check if Node.js and npm are installed, run following command in command prompt or terminal:
node -v
npm -v
If installed properly, you can see version numbers there or not installed, download and install Node.js.
1. Installing Create React App
Open your terminal or command prompt and run:
npx create-react-app (project_name)
Note: npx comes with Node.js and runs the latest version of CRA without installing it globally.
If npx is not available, install CRA globally using:
npm install -g create-react-app
create-react-app (project_name)
2. Navigate to the Project Directory
After installation, go into your project folder:
cd (project_name)
3. Open project in VS Code
code .
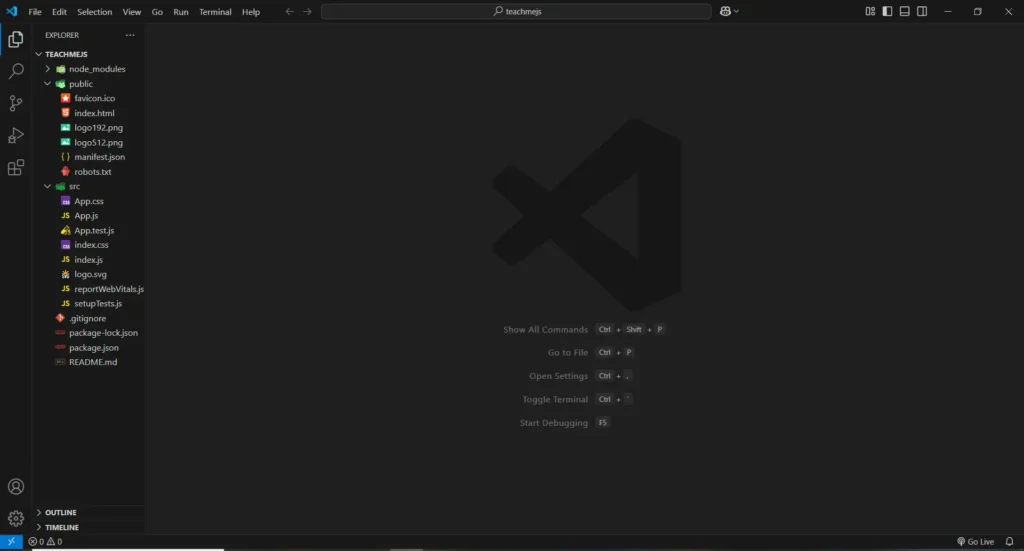
4. Folder Structure Explained
Once the installation is complete, the project folder will have the following structure:
(project_name)/

├── node_modules/

├── public/

│   ├── index.html

│   ├── manifest.json

│   └── favicon.ico

├── src/

│   ├── App.js

│   ├── App.css

│   ├── index.js

│   ├── index.css

│   └── logo.svg

├── .gitignore

├── package.json

├── README.md

└── yarn.lock or package-lock.json
Key Folders and Files
1. node_modules/
This folder contains all the dependencies (packages) installed via npm. You don’t need to modify this folder manually.
2. public/ Folder
- index.html – The main HTML file where the React app is injected.
- manifest.json – Contains metadata for progressive web apps (PWA).
- favicon.ico – The default React app icon.
3. src/ Folder
- index.js – The main entry file where React renders the app.
- App.js – The default component that gets rendered.
- App.css – Default styling for the App component.
- index.css – Global styles for the application.
- logo.svg – Default React logo (can be removed if not needed).
4. package.json
This file contains:
- Project metadata (name, version, description)
- Dependencies and scripts
- Configuration settings
5. .gitignore
Specifies files that should be ignored by Git.
3. Understanding index.js and App.js
What is index.js?
index.js is the entry point of the React application. It renders the root component (App.js) into the index.html file inside the public folder.
Default index.js Code

- ReactDOM.createRoot(document.getElementById(‘root’)) – Finds the div with the id root in index.html.
- root.render(<App />) – Renders the App component inside the root div.
- <React.StrictMode> – Helps detect potential problems in the app during development.
What is App.js?
App.js is a functional component that serves as the main React component of the application.
Default App.js Code
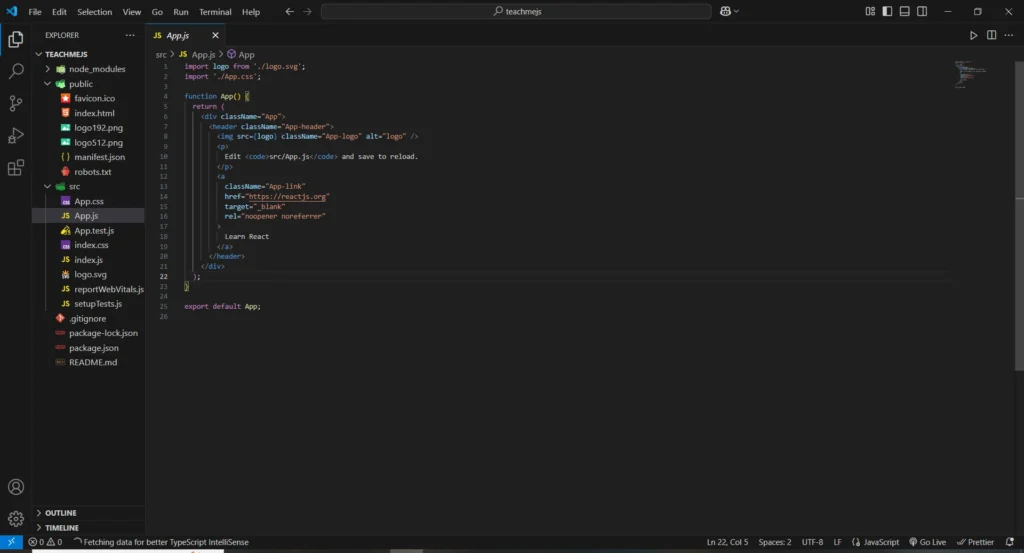
- function App() {} – Defines a React functional component.
- return (…) – Returns JSX code that represents the UI.
- export default App; – Exports the component so it can be imported elsewhere.
4. Running the React Application (npm start)
Starting the Development Server
After installing dependencies, start the development server with:
npm start
OR (if using Yarn):
yarn start
What Happens When You Run npm start?
- The development server starts.
- React compiles the app and opens it in the default browser.
- Any code changes automatically reload the page (hot reloading).
If successful, you will see the default React welcome page:
Final Thoughts
Congratulations! . You have successfully created and run your first React app.
Next Steps
Now that your React app is set up, you can:
- Start modifying App.js to create custom components
- Learn about React hooks (useState, useEffect)
- Explore React Router for navigation
Stay tuned for more React tutorials! 🚀